DIY Modern Wood LED Standing Lamp
12/12/2015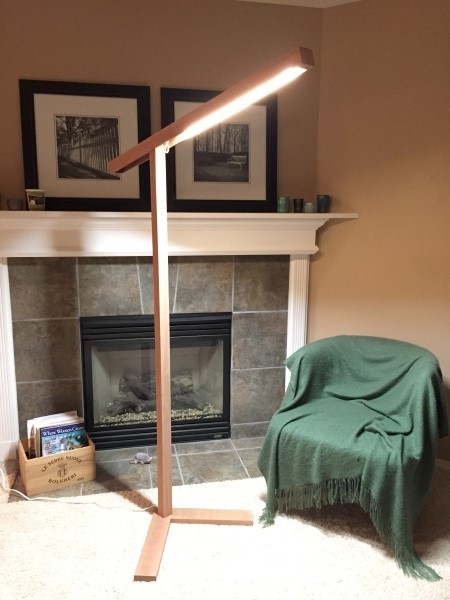
After going to our local lamp store and not seeing anything that met our needs, I decided to make my own standing LED lamp. I wanted something modern looking, taking advantage of the new possibilities LEDs have to offer.
Total Cost: ~$70 ($50 LED + $20 wood)
Time: A couple weekends
I went to Lowe’s and found their brightest under-cabinet LED bar. It has a touch-sensitive switch at the base that makes it easy to turn my lamp on and off.
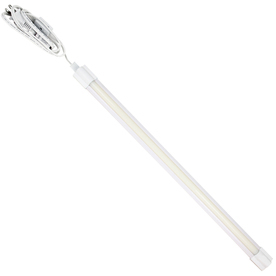
In hindsight, I spent too much on it and the added bulk of the housing got in the way of my design. If I were to do it again, I would get the plain LED strips that can be found on Amazon for much cheaper.
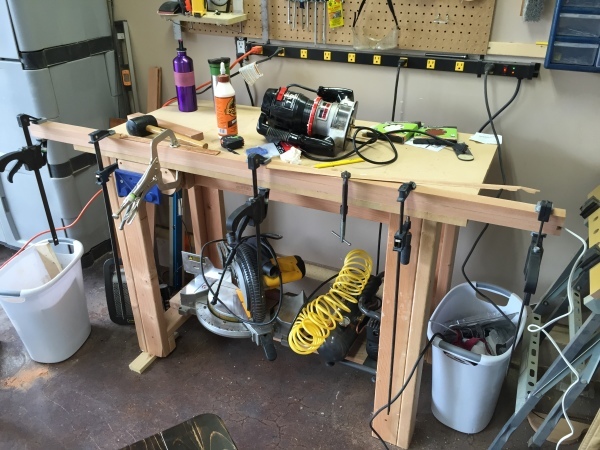
Tools Needed
- Table/circular saw
- Router
- Sander
- Drill
- Clamps
- Wood glue
- Stain (I used wipe-on polyurethane)
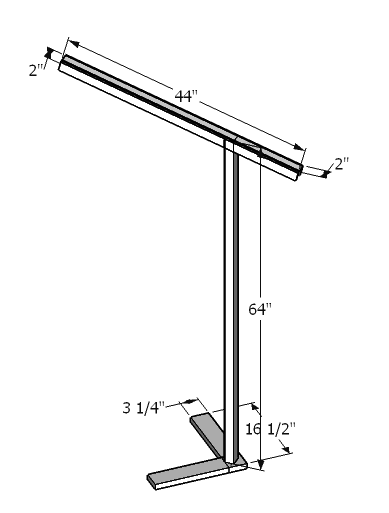
Cutlist
- (2) 4 x 16 x 1” (legs)
- (2) 2 x 64 x 1” (upright)
- (3) 2 x 44 x 1/4” (arm case)
- (2) 2 x 2 x 1” (arm caps)
I purchased several 1x4 boards. I used Sapele wood which I was told is a type of African Mahogany.
Making the cuts
Originally I had planned on routing the top of the uprights so that the arm case sat flush ontop, but decided it was too much work and ended up making the case wide enough to slip onto the upright.
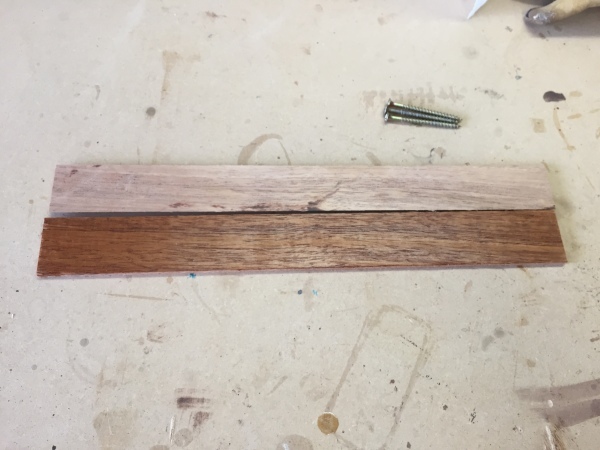
Your wood is probably not a full 1” thick, and that is a good thing for this project. The upright is two pieces glued together, and their combined width will be about 1.5”. Use this to figure out how wide to make the case.
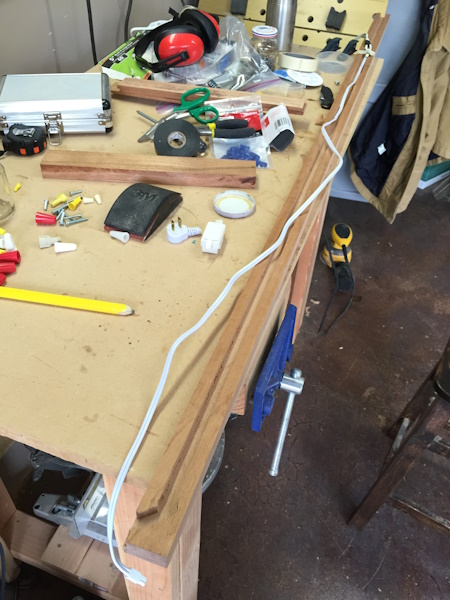
Channel for the power cord
As you can see below, I used my router to cut a channel in one of the upright pieces. To make the cord longer I spliced in a cheap extension cord. I then glued the cable in (after testing the light worked still!) and let that sit overnight.
Sand the upright and legs
The legs should match pretty well so sanding should be easy. I spent some time sanding the upright, as they were slightly uneven from my rip cut and I wanted them to be as seamless as possible. I went over it with my belt sander a bit then switched to my random-orbital sander.
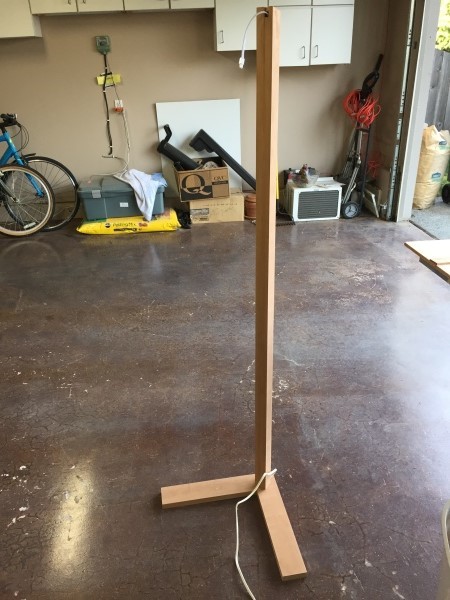
Attach the legs
First I used two pocket holes to tightly join the two legs together. The pocket holes are probably unnecessary but no one will ever see them because they are on the bottom of the legs.
I then used 3 large screws and wood glue to fasten the legs to the upright. Below you can see the power cord peeking out. (Sorry for the busy backgrounds in these photos)
Build the Arm/LED Case
I ripped the remaining 1x4 down to 1/4” width. From there I cut one piece to be the top, its width matching the width of the upright. And two sides, about the same width but 1/4” wider as they are just butt-jointed to the top.
For the caps I used a couple scrap pieces and cut them to size and glued them in. I used finishing nails in a few places to hold the case together while gluing but I could have probably gotten away with just clamps.
Go ahead and sand it before you attach it to the base.
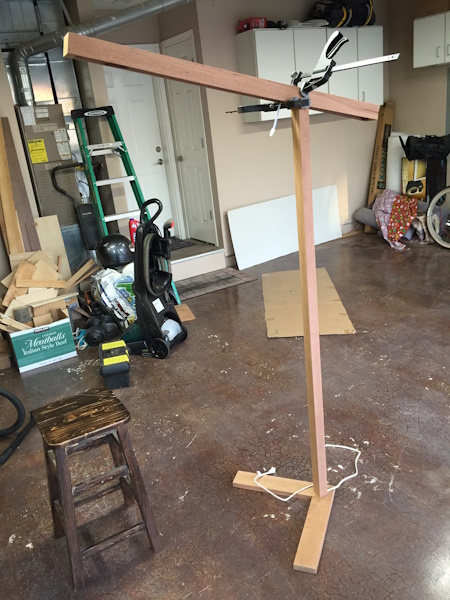
Attach the Arm to the Base
There’s plenty of glue surface here so I just made sure it was a tight fit and clamped the joint overnight.
Stain / finish
As I was using a darker wood, I didn’t use a stain and went straight to a wipe-on polyurethane. I used a piece of scrap to test. Looks good!
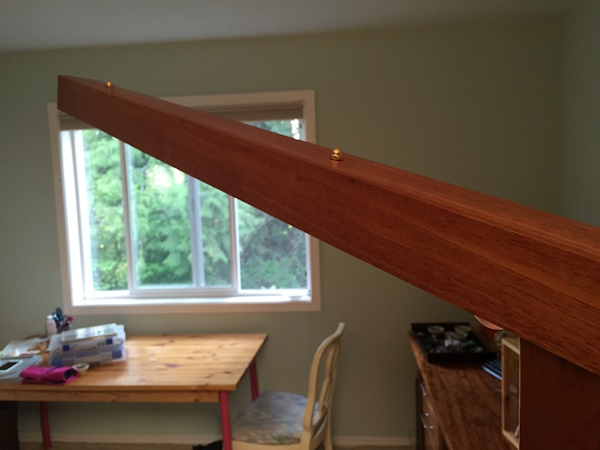
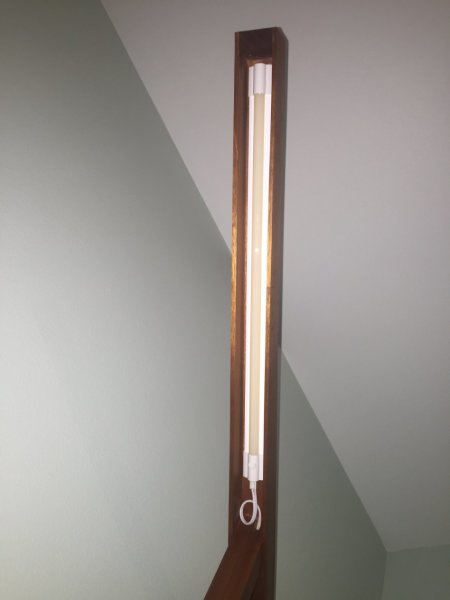
Fasten the LEDs in the arm case
At first I tried just velcro but that didn’t work very well so I put in a couple screws I found at Lowe’s and a couple brass caps. Since the lamp is pretty tall and in a corner, you don’t even see these popping out of the top.
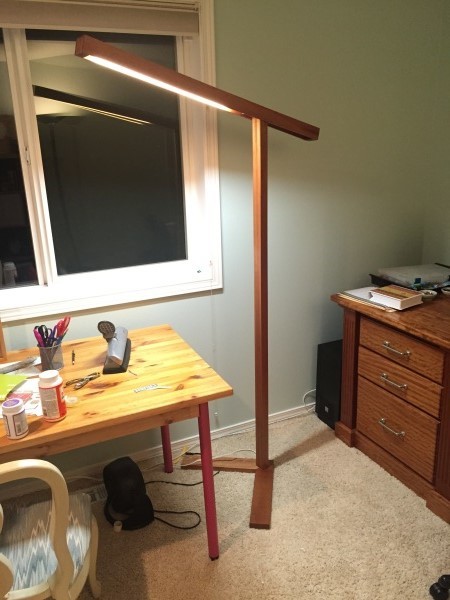
Show off your work because you’re done
That’s it! I was worried that the lamp would want to either tip backwards or forwards but it seems pretty well balanced. And the wood finish matches my desk pretty well, too!
Hindsight
If I were to build this again, I would use a different kind of LED. This would allow me to create a prettier arm that is fully enclosed.
I thought I might not be happy that the arm is at a fixed angle but that hasn’t been an issue at all.